
FOIL STAMPED PAPER BAG GUIDE
Foil Stamped Paper Bags: A Buyer’s Design Guide
Specify foil type, artwork, paper, proofing and quality checks for metallic details that remain crisp from flat sheet to finished luxury paper bag.
Foil stamped paper bags use a transferred decorative layer to create an opaque metallic, coloured, matte or diffractive detail on the bag surface. For most premium shopping bags, the practical starting point is a restrained hot-foil logo or motif on a production-approved paper. The finish should be designed on the bag dieline, sampled on the intended surface and inspected again after creasing, folding and handle fitting.
The effect can look simple, but a reliable specification connects artwork, paper texture, coating or lamination, foil grade, stamping tool, process order and acceptable variation. This guide explains those decisions for buyers who want luxury paper shopping bags with foil that supports the brand instead of creating avoidable production risk.

What are foil stamped paper bags?
Foil stamping is a transfer-finishing process rather than ordinary ink printing. In hot foil stamping, a heated die presses the selected image through a transfer foil onto the paper or its finished surface. The transferred layers form the visible decoration; the carrier web is removed. Gold and silver are familiar choices, but the same process family can produce coloured metallics, pigments, clear effects and diffractive patterns.
The KURZ Sustainability Report 2024 illustrates a typical graphic hot-stamping construction with a polyester carrier, release layer, protective and colour layers, a very thin aluminium metallisation and heat-sealing adhesive. That construction matters because a foil accent is not a sheet of household metal attached to a bag, and it should not be confused with a full plastic film laminate.
Is hot foil, cold foil or metallic ink the right choice?
| Decoration route | What it does well | What the buyer should confirm |
|---|---|---|
| Hot foil stamping | Opaque, reflective or pigmented accents; strong contrast; possible tactile impression | Paper and surface compatibility, die, heat and pressure setup, register, sample and process order |
| Cold foil transfer | Fine detail and effects integrated with printing; can be overprinted | Smooth and homogeneous surface, adhesive system, print sequence, colour and coverage |
| Metallic ink | Printed metallic colour without a separate stamping die; useful for some larger graphics or colour builds | Opacity, brilliance, paper influence, rub resistance and whether the visual target truly requires foil |
Sappi’s comparison of hot and cold foil explains that hot foil uses heat and an embossing die, while cold foil is transferred with adhesive. It also notes that cold foil places particularly high demands on surface smoothness, whereas hot foil can create a matte contrast on rougher paper even though a smoother surface generally produces greater brilliance.
Choose by the required appearance and the complete manufacturing route. Hot foil often suits a compact wordmark or symbol on a premium shopping bag. Cold foil may suit very fine printed effects on an appropriate smooth sheet. Metallic ink can be the better answer when the design needs a printed metallic tone rather than a mirror-like transferred accent. Ask the converter to show samples on comparable paper instead of approving from a screen.
When does foil add the most value to a luxury paper bag?
Foil works best when it has one clear job. It can create contrast on a dark paper, establish a focal point in a restrained design or repeat a metallic cue from a rigid gift box. It does not need to cover the whole front panel to feel premium. A small, accurately positioned mark often communicates more control than several competing finishes.
- Use foil for hierarchy: identify the one name, symbol or line that should catch light first.
- Use paper for character: let colour, fibre and texture carry the background instead of filling every area with decoration.
- Use scale deliberately: judge the design at normal carrying distance as well as close up.
- Use repetition selectively: echo the foil tone on a box or ribbon detail without copying every element onto every component.
- Use a physical reference: name or code the approved foil and keep a signed sample under controlled viewing conditions.
If the design depends on photographs, gradients or several process colours, print should normally carry that information and foil should remain a defined finishing layer. Our luxury paper bag printing guide compares offset, screen, digital and flexographic routes for the printed part of the design.
How should you choose paper for foil stamping?
Start with the intended visual character, then prove compatibility. Smooth coated paper can support sharp, brilliant foil. Uncoated or textured paper can create a softer, more tactile contrast, but deep texture may interrupt fine lines or broad solid areas. A laminate or coating changes the surface again and may require a different foil grade or process setting.
- Select the actual production paper, colour and grammage rather than a generic white substitute.
- State every surface treatment, including print, varnish, coating or lamination beneath the foil.
- Ask the converter and foil supplier to confirm compatibility with the complete surface stack.
- Stamp representative fine detail and solid areas on the proposed sheet.
- Crease, fold and convert the sheet so the approval reflects the finished bag, not only a flat sample.
- Check the result under the lighting in which the customer will see the packaging.
Do not specify a universal paper weight or stamping temperature from an online article. Bag paper must first support the product, handles, reinforcement and converting method; press settings then depend on the foil, die, surface and equipment. Use the luxury paper bag materials guide to shortlist the body paper before treating foil as the deciding factor.

How should foil artwork be prepared?
Create foil as a separate, clearly named artwork layer using vector shapes wherever possible. The layer should show exactly what transfers: solid black artwork is a common production convention, but the supplier’s file standard controls. Do not simulate shine with gradients, transparency or photographic effects unless the chosen process is designed to reproduce them.
- Use the approved bag dieline at final scale.
- Separate each foil colour or effect into its own named layer.
- Convert fonts to outlines or supply the required font files.
- Remove duplicate paths, stray points and hidden objects.
- Define whether foil registers to printed elements or stands alone.
- Keep essential detail away from creases, edges, glue areas, handle holes and turn-tops.
- Ask the converter for minimum line, gap and reversed-detail limits for the exact foil, die and paper.
- Include a marked visual showing the intended foil colour and a separate production file without visual effects.
Very fine positive lines can fail to transfer; very small reversed gaps can fill or bridge. Large solid areas can reveal uneven contact or surface variation. The correct limits are production-specific, so the approval route should include a supplier review and a physical strike-off. The paper bag artwork guide explains bleed, safe areas, panel mapping and finish-layer handoff in more detail.
Where should foil sit on the bag dieline?
A luxury shopping bag is printed and finished as a flat sheet before it becomes a three-dimensional object. Foil that looks centred on one isolated panel can move visually once side gussets, top folds and the base are formed. Place the artwork on the complete dieline and inspect both the flat sheet and assembled sample.
- Front and back panels: define the optical centre after allowing for folds and the finished viewing angle.
- Side gussets: avoid critical foil across folds unless the process has been tested for that exact construction.
- Top turn: leave practical clearance from the folded edge, reinforcement and handle attachments.
- Handle area: make sure rope knots, ribbon tabs, eyelets or punched holes do not interrupt the mark.
- Base and seams: keep important graphics away from glue zones and areas that rub during folding, packing or stacking.
- Paired panels: specify whether front and back use one die, two positions or different artwork.
Registration is a controlled production relationship, not a promise of mathematical perfection. BOBST’s official hot foil equipment overview highlights foil register, stable stamping force and heated tooling as central controls. Buyers should translate that process reality into an approved sample and agreed visual tolerances.
Can foil stamping be combined with embossing?
Yes. Foil and relief can be produced as separate registered operations or with tooling designed to transfer foil and create relief together. The visual result can be powerful, but it adds decisions about depth, paper deformation, register, reverse-side marking and the order of operations.
Begin with the simplest route that achieves the brand objective. A flat foil mark is easier to compare and may be more suitable near bag folds. A foil-and-emboss combination should be proven on the actual paper and assessed after conversion. Avoid adding relief merely because it is available; the paper texture, handle and rigid box may already provide enough tactile interest.
What should a foil sample prove?
| Approval stage | What it can prove | What it cannot prove alone |
|---|---|---|
| PDF or screen visual | Content, placement, layer naming and approximate scale | Metallic reflectivity, texture interaction, transfer or durability |
| Paper and foil swatches | Base colour, texture and general foil direction | Final artwork edges, register or converted-bag appearance |
| Foil strike-off | Artwork transfer on the intended or comparable surface | Every effect of folding, gluing, handles and bulk packing |
| Fully converted pre-production bag | Placement, conversion, handling, coordination and finished appearance | Long-run consistency unless production controls and inspection criteria are also defined |
A hard-copy colour proof made to ISO 12647-7:2016 can simulate a defined printing condition for the printed artwork, and the standard remains current after confirmation in 2022. It does not reproduce a physical foil transfer. Approve print and foil as separate technical questions, then approve how they appear together on the converted bag.
Use the custom paper bag samples guide to plan swatches, structural prototypes, proofs, strike-offs and pre-production samples without asking one sample to answer every question.
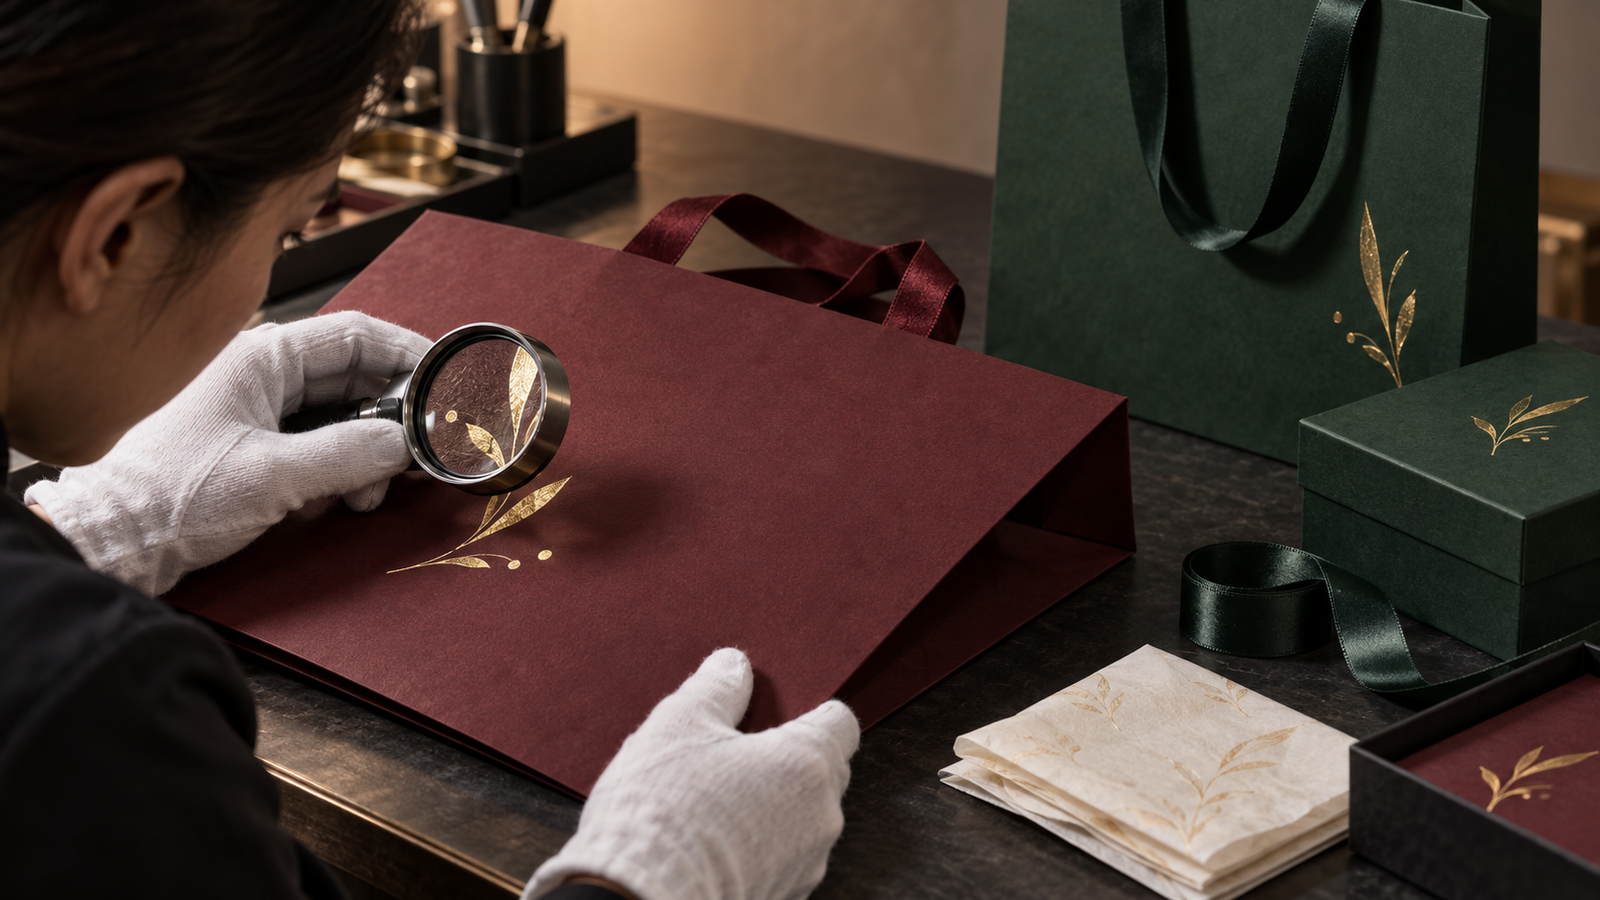
How should foil quality be inspected?
Inspection should compare production bags with an approved master under agreed lighting and at an agreed viewing distance. Separate critical defects from normal process variation. A tiny isolated speck and a missing part of the brand mark do not have the same effect, even if both are technically imperfections.
- Incomplete transfer: missing foil, pinholes or weak coverage in an important solid area.
- Filling or bridging: small gaps close and fine counters lose their intended shape.
- Misregister: foil no longer aligns acceptably with the printed image or approved panel position.
- Ragged edges: the mark lacks the clean contour shown by the approved sample.
- Scuffing or abrasion: handling, conversion or packing damages the reflective surface.
- Cracking near folds: decoration has been placed or processed in an area that cannot tolerate conversion.
- Unwanted impression: pressure or relief marks affect the reverse side or distort the paper beyond the approved appearance.
- Colour or brilliance drift: the production foil or surface differs visibly from the signed reference.
Define which zones are critical, major or less visible. Inspect the front logo, back panel, gussets and fold areas according to their role. Check samples from across the run rather than only the top of one carton, and include the finished bag in the wider paper bag quality-control plan.
Can foil stamped paper bags be recyclable?
A foil accent does not decide recyclability by itself. The complete bag includes body paper, inks, coatings, adhesives, handles, reinforcement boards and any laminate or eyelets. Collection and mill capability also differ by market, so a general design guide cannot certify a finished bag for every recycling system.
The February 2026 4evergreen Circularity by Design Guideline, Version 4 includes hot and cold transfer among decorative metallic components. It advises designers not to cover the paper-based packaging surface fully with metallisation because very high coverage can affect detection in sorting. The guideline also says actual testing prevails over general recommendations and that formulation can change behaviour.
Use foil as a controlled accent, document the complete material stack and ask for evidence that matches the real construction and destination market. Do not claim that a bag is recyclable merely because the foil area is small, and do not assume that any metallic appearance makes the bag non-recyclable. Our guide to recyclable luxury paper bags shows how to review the whole construction.
How should foil coordinate across bags, boxes, ribbon and tissue?
The paper bag is the public-facing carrier; the rigid box creates the closer unboxing moment. They can share a foil tone without using identical artwork. For example, the bag may carry one bold metallic mark, the box a smaller hot-foil line, the ribbon a woven colour echo and the tissue a quiet printed pattern.
- Approve the foil beside the actual bag paper and box wrap, not in isolation.
- Decide whether the ribbon should match the foil, the paper or a secondary brand colour.
- Keep tissue printing light enough that it supports the reveal rather than competing with the bag.
- Check metallic colour under retail lighting and daylight; reflected colour changes with the environment.
- Use one controlled reference for repeat orders across the packaging set.
A coordinated system does not require every component to be metallic. The luxury packaging sets guide explains how paper bags, rigid boxes, tissue and ribbon can share colour, scale and sequence while keeping a distinct role.
What affects the cost and MOQ of foil stamped bags?
Foil cost follows the exact specification and production plan. Tooling, foil type, stamped area, number of colours or passes, register requirements, sheet layout, paper surface, order quantity, sampling and inspection all matter. A small mark still requires setup and a die, while a broad solid may use more material and demand more difficult transfer control.
- Compare quotations using the same bag dimensions, paper, print, foil artwork and quantity.
- Confirm whether tooling and pre-production samples are separate or included.
- Ask whether the quoted die remains available for repeat orders and how revisions are handled.
- State the number of designs, sizes and foil colours rather than combining them into one total quantity.
- Confirm packing protection so finished foil does not scuff in cartons.
- Compare the complete landed usable cost, not only the unit finishing charge.
There is no credible universal minimum order for all foil stamped paper bags. The practical minimum depends on paper purchasing, printing, stamping setup, conversion and the number of variants. If a lower-quantity option changes the paper, foil process or bag construction, compare it as a different specification.
What belongs in a foil stamped paper bag RFQ?
- Finished bag width, gusset and height.
- Product dimensions, packed weight and retail use.
- Body paper, colour, texture and grammage direction.
- Printing, coating, varnish or lamination beneath the foil.
- Foil colour, effect, supplier reference or physical target.
- Vector artwork on the approved bag dieline.
- Foil position on each panel and relationship to print.
- Flat foil, foil plus embossing or another defined route.
- Handle, eyelet, top reinforcement and base-board construction.
- Quantity by size, design and delivery lot.
- Required sample stages and approval deadline.
- Critical visual zones and defect-acceptance method.
- Master-carton protection, destination, delivery term and launch date.
- Matching rigid box, tissue paper and ribbon requirements.
If the foil route is undecided, provide the visual objective and ask the supplier to compare practical options on the same paper. A reflective gold logo, a matte pigment mark and a metallic printed colour solve different problems; naming the desired effect is more useful than asking for “premium foil” without a reference.
Frequently asked questions about foil stamped paper bags
Can hot foil be stamped on uncoated or textured paper?
Often yes, but texture changes the appearance and transfer. A rough sheet may create a softer, more broken or matte effect than a smooth coated surface. Stamp the intended artwork on the production paper and approve the result after conversion.
Is hot foil better than cold foil for paper bags?
Neither is universally better. Hot foil is a strong option for opaque accents and can work across a broad range of suitable surfaces. Cold foil can support fine detail and integration with print but usually needs a smooth, homogeneous surface. The converter should recommend the route for the artwork, paper and run.
Is gold foil the same as metallic gold ink?
No. Foil is a transferred decorative layer and can produce a highly opaque reflective effect. Metallic ink is printed and its colour, opacity and brilliance depend more directly on the ink system and paper. Compare physical samples before choosing.
Can both sides of a luxury paper bag be foil stamped?
Yes, when the sheet layout, tooling, surface and budget support it. Specify the front and back positions separately and confirm whether one die or multiple setups are required. Inspect any pressure marks and the finished visual alignment after the bag is assembled.
Will foil crack when the bag is folded?
Foil placed across a crease or highly flexed area carries more risk than foil on a stable panel. Paper, surface treatment, foil grade, crease design and conversion all matter. Keep critical artwork away from folds unless a production-relevant sample proves the intended effect.
Approve the finish as part of the complete bag
Successful foil stamped paper bags begin with a clear visual purpose and end with a controlled production reference. Choose the paper and surface first, prepare a clean foil layer on the dieline, prove the transfer on the intended construction, define inspection criteria and protect the finished bags through packing and delivery.
Bespoke Packaging develops custom foil stamped paper bags alongside rigid gift boxes, tissue paper and ribbon. Share your bag size, product weight, artwork, quantity, delivery market and preferred foil direction, and we can help plan a production-ready specification and coordinated sample.